
What to Wear on a Himalayan Winter Trek (and Where Your Graphic Tee Fits)
Planning Kedarkantha, Brahmatal or Dayara Bugyal this winter? Here is the simple layering system that keeps you warm on the trail, plus where your graphic tee fits in.
In this post 8
Winter trek season in the Himalayas runs from December to February, and now is when most people start planning and booking. Kedarkantha, Brahmatal, Dayara Bugyal: the names keep popping up on your feed with photos of snow-covered camps and orange sunrises.
Here is the part nobody posts about: what you actually wear when it is minus five outside your tent. This guide keeps it simple. You will learn the layering system trek leaders recommend, the mistakes first-timers make, and where your favourite graphic tee does (and does not) belong on a snow trek.
Which winter treks are we talking about?
Most beginner-friendly winter treks in India are in Uttarakhand and sit around 11,000–12,500 ft. Popular ones include:
- Kedarkantha (about 12,500 ft), starting from Sankri village
- Brahmatal (about 12,250 ft), starting from Lohajung
- Dayara Bugyal (meadows around 11,800 ft)
- Deoriatal–Chandrashila (summit around 12,000 ft)
- Kuari Pass (about 12,500 ft), a little tougher
Most of these take around six days including travel. December usually brings frosty mornings, clear views and only a little snow. January and February are the big snow months, when the trails are properly white. Trek organisers also say winter makes a trek roughly one grade harder than the same trail in other seasons, so plan for that.
How cold does it actually get?
On a typical winter trek, daytime temperatures sit around 8°C to 15°C while you are walking in the sun. That feels fine, even warm, once you start climbing.
Nights are a different story. At camp, expect roughly 3°C to -5°C, and it can drop to around -10°C after sundown. That swing between a sunny afternoon and a freezing night is exactly why layering matters more than one big jacket.
The layering system, explained simply
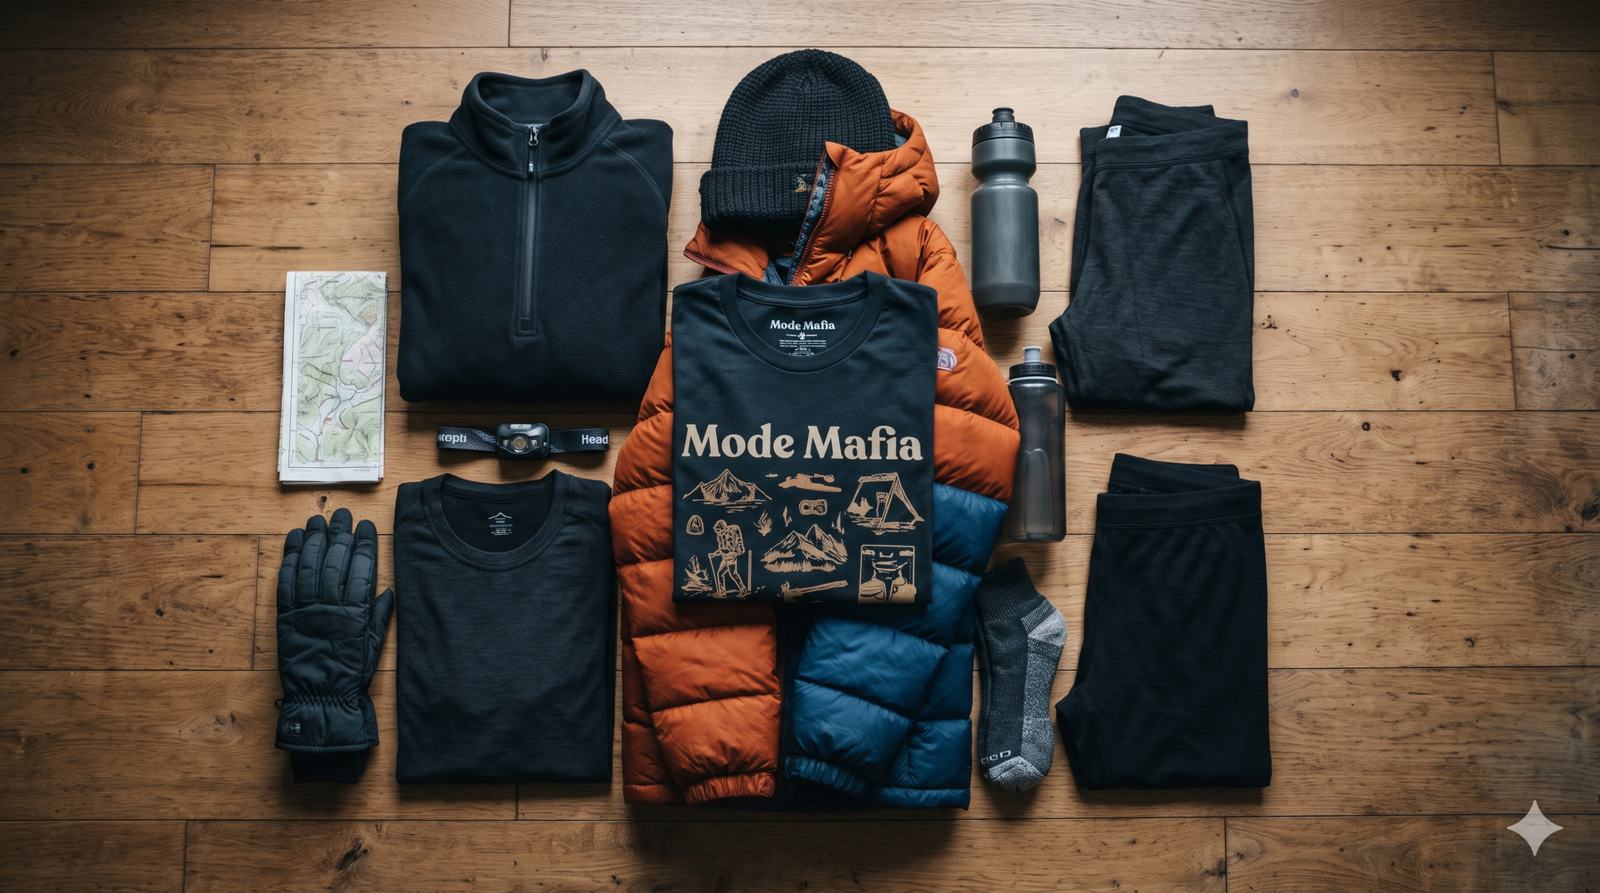
Layering means wearing several thinner layers instead of one heavy one. You add or remove them as the temperature changes. A common rule of thumb from trek organisers is to carry at least five warm layers:
- Thermals (top and bottom), mainly for camp and sleeping
- Two sweaters or warm mid layers
- A fleece jacket
- A padded jacket with a hood, ideally water-resistant
While walking during the day, you will usually need only one or two layers. The moment the sun goes down, everything goes on.
| Layer | When you wear it | What to look for |
|---|---|---|
| Quick-dry trek tee | On the trail | Synthetic, sweat-wicking |
| Thermals | At camp and sleeping | Snug fit, warm |
| Sweaters / fleece | Evenings, cold mornings | Light, easy to pack |
| Padded jacket | Night, summit morning, wind | Hood, water-resistant |
| Cotton graphic tee | Travel days, base village, home | Comfort and style |
Where your graphic tee fits (and where it doesn’t)
Let’s be straight about this. Trek leaders advise against cotton on the trail itself. Cotton takes a long time to dry, so a sweaty cotton tee under your layers on a snowy climb will make you feel colder. For the walking part, pick a synthetic quick-dry tee.
But a trek is not only the trail. There is the overnight bus, the long drive from Dehradun to Sankri, the chai stops, the homestay evening in the base village, and the ride back. That is where a soft cotton graphic tee earns its spot in your bag:
- Travel days: comfortable for long bus rides, and it looks good in the group photo at the start point
- Base village evenings: a clean, dry tee under your fleece feels great after a hot meal
- The ride home: you will want something fresh after six days in trek clothes
- After the trek: the tee becomes your memory of the trip every time you wear it
Our Trekking & Hiking T-Shirts are made for exactly this crowd: people who live for the mountains and want to show it off back in the city. Keep one dry tee sealed in a plastic bag at the bottom of your backpack for the journey home. Your future self will thank you.
Head, hands and feet: the small stuff that matters
Most people pack a good jacket and then forget the edges of the body, which is where you feel the cold first.
- Head: a woollen cap and a neck warmer
- Hands: two pairs of gloves, a waterproof pair for the snow and a thick fleece pair for camp evenings
- Feet: trekking shoes with ankle support and grip (sports shoes will not work in snow), plus woollen socks for sleeping
- Snow gear: gaiters keep snow out of your shoes, and microspikes give grip on hard snow (many trek organisers provide these, so check before buying)
- Eyes: sunglasses are a must, because snow reflects a lot of light
Common first-timer mistakes
- Packing for the day, not the night. The afternoon feels easy; the night tests you.
- Wearing cotton on the trail. Save it for the bus and base village.
- Skipping fitness prep. Start training 1.5 to 2 months before. A common target is running 5 km in about 40 minutes.
- Overpacking heavy jeans and extra shoes. Quick-dry trek pants and one good pair of trekking shoes are enough.
- Forgetting the small things: a thermos, a raincover for your backpack, lip balm or petroleum jelly, and a small deodorant for synthetic clothes.
A quick packing checklist
- Two or three quick-dry trek tees for the trail
- One or two cotton tees for travel days and base camp
- Thermals (top and bottom)
- Two warm mid layers plus a fleece jacket
- Padded jacket with a hood
- Trek pants (track pants only as a backup)
- Cap, neck warmer, two pairs of gloves, woollen socks
- Trekking shoes, gaiters, sunglasses
- Thermos, backpack raincover, basic toiletries
Before you order
If you want a trek tee for the trip, order it before you start packing so it arrives in time. Here is what to know:
- Printed to order: each tee is printed after you order, so give it about a week to reach you.
- Free shipping on orders of ₹1,199 or more.
- Cash on delivery is available on eligible PIN codes.
- Check the size guide on the product page. If you like a relaxed fit to wear over thermals at base camp, compare the chart with a tee you already own.
Pack light, layer smart, and save the graphic tee for the moments you will actually be photographed in it. See you on the trail.
Share this post
Keep reading

Trek & Travel
Short Treks for the Diwali Long Weekend (and What to Wear)
Got a few days off around Diwali on 8 November? Here are four easy short treks across India, how to plan the…
Bhai Dooj Gift Ideas 2026: Graphic Tees Your Sibling Will Actually Wear
Stuck on a Bhai Dooj gift this year? Here's how to pick a graphic tee that matches your sibling's vibe, gets the…

Seasonal
Halloween outfit ideas in India (no costume needed)
Six easy Halloween looks built around one graphic tee, for college parties, cafe nights and house parties.